Practical Git and GitHub for Field Technicians

Introduction
GitHub, and by extension Git, is not just for software developers. It is a standard tool for anyone who manages versions, configurations, scripts, or documentation in general. Tech professionals often juggle network and software configurations, automation scripts, and troubleshooting notes. GitHub helps you track changes, maintain backups, store ideas, and collaborate efficiently with teams.
Why Technicians Should Use GitHub
Git provides change tracking, accountability, and rollback capabilities.
- Change tracking lets you see who modified a configuration file, when, and why.
- Accountability ensures that every change is tied to a technician’s commit message.
- Rollback means that if a configuration breaks a device or system, you can instantly revert to a previous working version.
Instead of guessing what changed, you can review a complete history of edits, which is perfect for maintaining consistency across multiple sites or devices.
A Brief History of Git and GitHub
The following section was adapted from The Git Origin Story published by Linux Journal. [1]
Before Git existed, Linus Torvalds and the Linux kernel community managed source code manually. Contributors would send patches to mailing lists, and Linus would apply them directly to his local copy of the kernel. There was no structured revision history… only large diffs between one release and the next. Although open-source version control systems like CVS existed, Linus disliked them for being slow, centralized, and prone to errors when handling simultaneous edits.
In 2002, Linus adopted BitKeeper, a commercial distributed revision control system developed by Larry McVoy’s company, BitMover. BitKeeper introduced a revolutionary concept for its time: distributed development, where every developer could have a complete copy of the project and merge changes independently. This made collaboration on large projects like the Linux kernel far more efficient. However, BitKeeper was closed source, and its licensing restrictions created friction within the open-source community. Developers were uneasy that the world’s most important open-source project depended on proprietary software.
The tension came to a head in 2005, when BitMover revoked free licenses after an attempt by Andrew Tridgell (creator of Samba and rsync) to reverse-engineer BitKeeper’s communication protocol. Overnight, the Linux kernel lost its primary development tool. Rather than return to older systems like CVS or Subversion, Linus decided to create a new system from scratch-one that combined BitKeeper’s distributed power with open-source freedom.
In just a few weeks, Linus designed and built Git, focusing on three main principles:
- Speed: capable of handling massive projects and thousands of commits quickly
- Integrity: every file and commit identified by a secure hash (SHA-1)
- Distributed architecture: every developer has a full local repository
By July 2005, Git was already self-hosting and used for kernel development. Linus soon handed maintenance over to Junio C. Hamano, who organized Git’s complex low-level commands into the user-friendly tools we use today. The original core commands (called “plumbing”) were wrapped with higher-level “porcelain” commands, making Git accessible beyond experts.
A few years later, in 2008, GitHub was launched by Tom Preston-Werner, Chris Wanstrath, and PJ Hyett. GitHub provided a simple web interface for Git, allowing users to host repositories online, track issues, and collaborate through pull requests. This made Git’s powerful distributed model easy for individuals and teams to adopt.
Today, Git remains the foundation of modern software and system configuration management, while GitHub serves as the world’s most popular platform for sharing, reviewing, and maintaining projects of every kind, from codebases to documentation.
Installing Git
Standard Windows Installation
- Go to the official site: https://git-scm.com/download/win
- Download the 64-bit Git for Windows installer.
- Run the installer:
- Keep defaults unless you know you need custom behavior.
- Recommended choices:
- Use Git from Git Bash and command prompt
- Use bundled OpenSSH
- Checkout Windows-style / commit Unix-style line endings
- Finish installation; Git Bash will be available from Start Menu.
- Verify installation
Open PowerShell or Git Bash:
git --version
Linux Installations
Debian/Ubuntu
sudo apt update
sudo apt install git
git --version
Fedora
sudo dnf install git
git --version
Arch Linux
sudo pacman -S git
git --version
Installation on macOS
Option A: Using Xcode Command Line Tools (recommended)
This is the simplest and gives you the Apple-maintained Git build.
- Open Terminal.
- Run:
xcode-select --install
- A popup appears → click Install.
- After installation, verify:
git --version
Option B: Homebrew (for latest releases)
- Install Homebrew (if not installed):
/bin/bash -c "$(curl -fsSL https://raw.githubusercontent.com/Homebrew/install/HEAD/install.sh)"
- Install Git:
brew install git
- Verify:
git --version
Post-install Setup
Before you start using Git, it’s important to tell Git who you are so your work can be properly identified. The following commands set your global name, email, and preferred editor. These details are stored once on your system and used automatically for all future commits, ensuring that every contribution is correctly attributed and easy to manage.
Set username and email:
git config --global user.name "Your Name"
git config --global user.email "you@example.com"
Quality of Life
Git is the version control engine that handles cloning, committing, branching, and tracking changes. To use Git, you need a shell (a terminal environment) to run commands in. On Windows, technicians typically choose between two environments:
Git Bash gives you a Linux-style terminal and works with Git immediately after installation.
PowerShell is the Windows-native terminal and also runs Git without extra setup.
For PowerShell users, there is an optional enhancement called posh-git. This is not a replacement for Git. It simply improves your PowerShell experience by showing the current branch, displaying file status, and providing autocomplete for Git commands. You still run the exact same Git commands; the prompt just becomes more informative.
In short: Git is the tool you use The shell is where you run it posh-git is an optional upgrade for PowerShell users
Enabling posh-git in PowerShell
If you prefer working in PowerShell, you can enable posh-git for clearer prompts and better usability.
- Remember Powershell is Case Sensitive.
Install posh-git:
Install-Module posh-git -Scope CurrentUser
Enable it:
Add-PoshGitToProfile -AllHosts
Once enabled, your PowerShell prompt will automatically display branch names and Git status whenever you are inside a repository.
Generate an SSH key - Link Git to your GitHub Account
Before you can securely connect your computer to GitHub or any remote Git server, you need a way for the server to recognize who you are without constantly asking for a password. That’s where SSH keys come in. They provide a simple, secure form of authentication that lets Git verify your identity automatically whenever you push, pull, or clone a repository.
- Run:
ssh-keygen -t ed25519 -C "you@example.com"
The “you@example.com” part is just a label added to the SSH key so you can identify it later. It’s usually set to your GitHub email for convenience, but it doesn’t affect security and is not required to match your account. You can use any email, your GitHub no-reply address, or even a simple description like “my laptop key”.
- Press Enter to accept the default file location and create the key pair.
- Start ssh-agent:
eval "$(ssh-agent -s)"
ssh-add ~/.ssh/id_ed25519
This starts a small background program that safely stores your private key in memory. Adding your key to the agent lets Git use it automatically when connecting to GitHub, without asking for a password each time.
- Copy the public key:
cat ~/.ssh/id_ed25519.pub
This displays your public key — the part you share. You’ll paste this into GitHub or GitLab. It’s safe to show to others, unlike your private key.
- Add it to GitHub/GitLab → Settings → SSH keys.
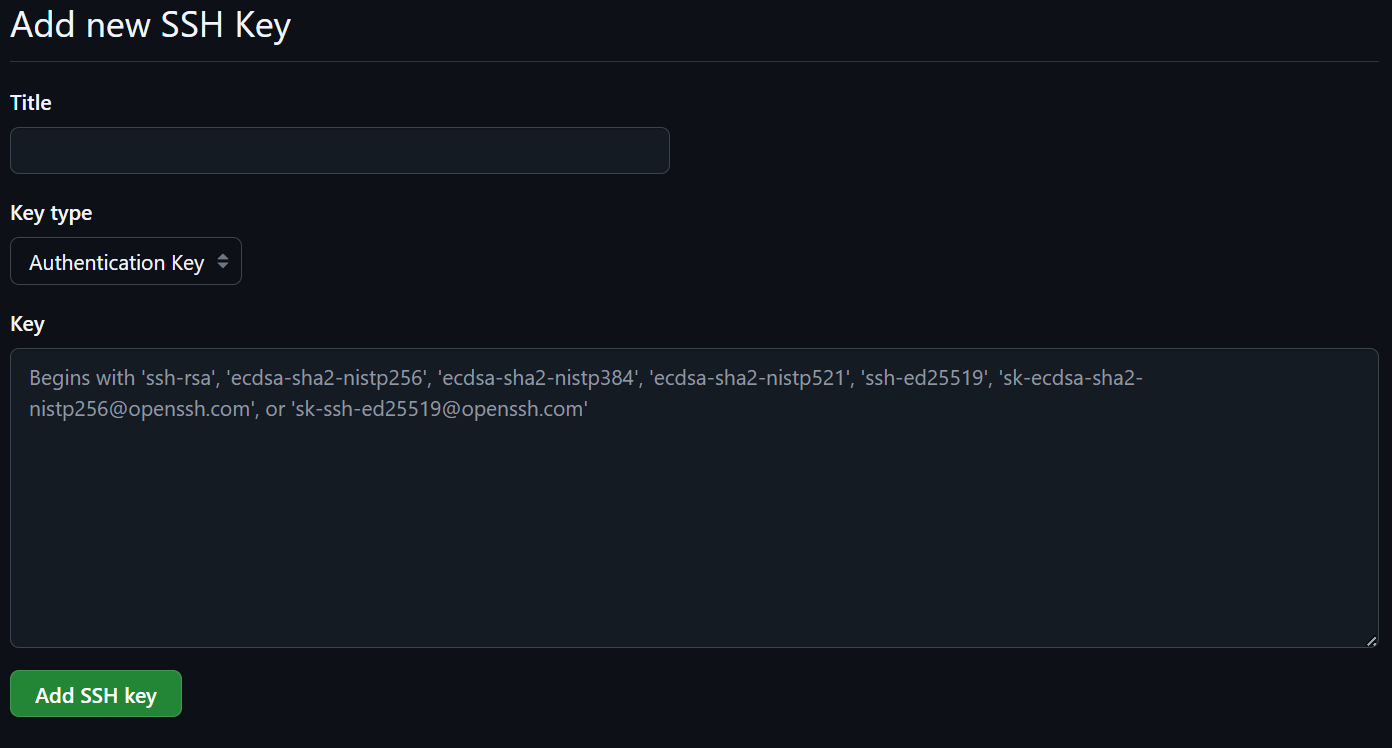
Pasting your public key here tells GitHub or GitLab to trust your computer. Once added, the site can authenticate you securely using the matching private key on your machine.
Creating Your First Repository
A repository (often called a repo) is the place where Git stores your project’s files and tracks every change you make. Once your project is inside a repository, Git can record versions, manage branches, and sync everything with GitHub. Creating your first repository is the foundation of working with Git.
- Create a new folder for your project (or use an existing one):
mkdir my-first-repo
cd my-first-repo
This gives Git a dedicated place to track your work. Any folder can become a Git repository as long as you initialize it.
- Initialize the repository:
git init
This creates a hidden .git directory that stores all version history and configuration for your project. Your folder is now officially a Git repository.
- Add a file to the project, for example a README:
echo "# My First Repository" > README.md
You need at least one file for your first commit. A README is a common choice because it describes the project.
- Stage your new file:
git add README.md
Staging tells Git which changes you want to include in the next commit. You can stage one file, many files, or all changes at once.
- Commit your work:
git commit -m "Initial commit"
A commit is a snapshot of your project at a point in time. This first commit marks the starting point of your project’s history.
- Connect your repo to GitHub:
git remote add origin git@github.com:your-username/your-repo.git
git push -u origin main
- If your GitHub repository uses the main branch, use main. If it uses master, replace main with master.
This links your local repository to a remote one on GitHub. Pushing uploads your commits so they are backed up and accessible online.
Cloning and Syncing Changes
Cloning is how you download a copy of an existing GitHub repository to your computer so you can work on it locally. Once a project is cloned, you’ll regularly sync changes by pulling updates from GitHub and pushing your own work back up. These commands form the core workflow of using Git every day.
- Clone a repository from GitHub:
git clone git@github.com:your-username/your-repo.git
This creates a complete local copy of the project, including all files, branches, and history. You only need to clone a repository once.
- Move into the project folder:
cd your-repo
Git commands only apply inside a repository, so you must be in the correct directory to work with it.
- Pull the latest changes:
git pull
This updates your local copy with any changes that were made on GitHub since you last worked on the project. Pulling regularly keeps your work in sync with others.
Make your changes locally Edit files, add new ones, or remove old ones. Git will track all modifications inside the repository folder.
Stage your changes:
git add .
Using a dot stages every changed file at once. You can also stage individual files if you prefer more control.
- Commit your work:
git commit -m "Describe what you changed"
Each commit captures a snapshot of your progress and makes it easy to review or undo changes later.
- Push your changes to GitHub:
git push
This uploads your new commits to the remote repository so your changes are saved, backed up, and visible to collaborators.
Every time you commit and push to GitHub, your work is versioned and safely stored in the cloud. This means you automatically get a backup and a complete history of your project without setting up anything extra.
Branching and Collaboration Basics
Branches let you work on new features or fixes without affecting the main version of your project. This makes it safe to experiment, collaborate with others, and keep your work organized. When your changes are ready, you merge your branch back into the main branch so the whole team can use them.
- Create a new branch:
git branch feature-idea
A branch is a separate line of development. Creating one lets you work independently from the main branch.
- Switch to your branch:
git checkout feature-idea
This moves you into the new branch so any changes you make will belong to it.
- Create or edit files, then commit your changes:
git add .
git commit -m "Add new feature"
Your work is safely stored in your branch, keeping the main branch clean and stable.
- Push your branch to GitHub:
git push -u origin feature-idea
This uploads your branch to GitHub so others can review or collaborate on it.
Open a pull request on GitHub A pull request (PR) is how you propose merging your branch into the main branch. It lets teammates comment, review changes, and ensure everything is ready before merging.
Merge the pull request Once approved, GitHub will merge your branch into the main branch. This updates the project with your new feature or fix.
(Optional) Delete the branch:
git branch -d feature-idea
After merging, deleting old branches keeps your repository tidy.
Branching and Collaboration Basics (Advanced)
Branches allow multiple developers to work on different features or fixes at the same time without interfering with each other. By understanding how to manage branches, keep them up to date, and collaborate through pull requests, you maintain a clean project history and reduce the risk of conflicts.
- Create and switch to a new branch in one step:
git checkout -b feature-idea
This command both creates the branch and moves you onto it. Branch names are usually short and descriptive, such as feature-login, bugfix-typo, or docs-update.
- Work on your changes and commit them:
git add .
git commit -m "Implement new feature"
Each commit represents a logical step in your work. Smaller, clear commits make it easier for reviewers to follow your progress.
- Keep your branch up to date with the main branch:
git checkout main
git pull
git checkout feature-idea
git merge main
Regularly merging the latest changes from main reduces merge conflicts later and ensures your feature works with the most recent project updates.
Tip: You can also use git rebase main instead of merge for a cleaner, linear history, but rebase rewrites commit history, so use it carefully when collaborating.
Important: Do not rebase branches that teammates are already using. Rebasing shared branches rewrites history and can cause conflicts or confusion for anyone who has already pulled the original branch.
- Push your branch to GitHub:
git push -u origin feature-idea
Other contributors can now see your work, comment on it, or help finish it. Setting the upstream branch lets you use plain git push or git pull without extra parameters.
Open a pull request (PR) A PR is where collaboration happens. Teammates review your changes, discuss improvements, and check for issues. Good PR descriptions explain what you changed and why. This helps maintain quality and consistency across the project.
Address feedback and update your branch After reviewing feedback, continue committing changes:
git add .
git commit -m "Apply review feedback"
git push
Your PR updates automatically as you push new commits.
Merge the pull request Once approved, merge your branch into main using GitHub’s interface. This integrates your work and triggers any CI workflows, tests, or deployments configured in the project.
Clean up the finished branch:
git branch -d feature-idea
git push origin --delete feature-idea
Removing merged branches locally and on GitHub keeps the project tidy and avoids confusion.
Using GitHub for Documentation
GitHub isn’t just for code. It’s also a powerful platform for writing, organizing, and publishing documentation. Whether you’re explaining a project, writing tutorials, or maintaining technical notes, GitHub’s Markdown support and version control make your documentation easy to update, track, and collaborate on.
- Create or edit documentation files:
echo "## Project Overview" > README.md
Markdown (.md) files format cleanly on GitHub and are ideal for documentation. The main README often acts as the front page of your project.
- Organize your docs using folders:
mkdir docs
echo "## Installation Guide" > docs/installation.md
Grouping related documentation into a docs folder helps keep your repository structured as it grows.
- Commit changes to Git:
git add .
git commit -m "Add initial documentation"
Commits create a record of who changed what and when, making it easy to revert mistakes or review documentation history.
- Push documentation updates to GitHub:
git push
Your updated docs appear instantly on GitHub, making them accessible to collaborators or anyone viewing your repo.
Use GitHub’s built-in Markdown renderer GitHub automatically formats Markdown into clean, readable pages. Headings, lists, links, code blocks, and images all display beautifully without any complex setup.
(Optional) Enable GitHub Pages for documentation websites If you want your documentation to appear as a polished website, you can enable GitHub Pages directly from your repository settings. It can use a docs/ folder or a dedicated branch to publish a full website.
Review and discuss documentation using pull requests Treat documentation changes the same way you treat code changes. Creating pull requests lets your team review updates, suggest improvements, and keep the docs accurate.
Tips and Common Mistakes
Working with Git becomes much easier once you understand a few simple habits and pitfalls. These tips will help you avoid frustration and keep your projects organized as you learn.
Commit often with clear messages Frequent commits make it easier to track your progress and roll back changes if something goes wrong. Good commit messages explain why a change was made, not just what changed.
Pull before you push
git pull
Running a pull before pushing helps prevent conflicts, especially when collaborating with others. It keeps your local branch up to date with any changes from GitHub.
- Don’t forget to stage your changes New users often edit files but forget to stage them with:
git add .
If your commit seems empty, it’s usually because nothing was staged.
Avoid committing large or secret files GitHub stores everything you commit, even if you delete it later. Avoid committing things like credentials, API keys, or large binary files. Use a .gitignore file to exclude them.
Use branches instead of working directly on main Branches make it safer to experiment without breaking your main project. They also make collaboration smoother.
Read error messages carefully Git’s errors look intimidating, but they usually tell you exactly what’s wrong. Most issues come down to missing a pull, forgetting to add files, or pushing to the wrong branch.
Don’t panic — nothing is ever truly lost Git stores your history extremely well, and even if something goes wrong, commits can often be recovered. As long as you regularly pull and push your work to GitHub, your changes are safely backed up and easy to restore, which makes Git far less scary than it seems at first.
Keep your repository clean Delete old branches after they’re merged, and use organized folder structures for documentation and assets. A tidy repo is easier for you — and collaborators — to navigate.
Conclusion
Git and GitHub give field technicians a reliable way to manage configurations, track changes, and document their work with confidence. Whether you are maintaining network settings, updating scripts, organizing troubleshooting notes, or collaborating across teams, version control adds structure and safety to your daily workflow. By learning the basics of repositories, branching, syncing changes, and secure authentication, you gain a toolkit that reduces errors, speeds up troubleshooting, and preserves a complete history of your work.
As you continue using Git, these skills will become second nature. Start small, commit often, and make GitHub your central source of truth for documentation and configuration management. With these practices in place, you will always know what changed, when it changed, and how to get back to a known working state. In the field, that kind of clarity is invaluable.
References
[1] Linux Journal. *The Git Origin Story. 2009. https://www.linuxjournal.com/content/git-origin-story
Official Git Documentation
The primary source for Git behavior, commands, and concepts.
Git book (Pro Git) - https://git-scm.com/book/en/v2
Git basics tutorial and command reference - https://git-scm.com/docs
Disclaimer: AI tools were used in the development of this article to assist with drafting and refinement. All content has been reviewed and approved for accuracy.